
Table of Contents
Line & Value
Mastering hatching and cross-hatching is an essential step in becoming a confident and versatile artist. These linear techniques date back centuries and are still used by illustrators, draftsmen, and fine artists today. Simple yet powerful, they provide a way to depict depth, volume, light, and surface quality using only lines. Whether you work in graphite, pen and ink, or digital tools, incorporating hatching into your work brings both structure and expressive texture.

In this guide, you’ll learn how hatching and cross-hatching function, when to use them, how to refine your mark-making, and what materials or brush settings can best support your goals.
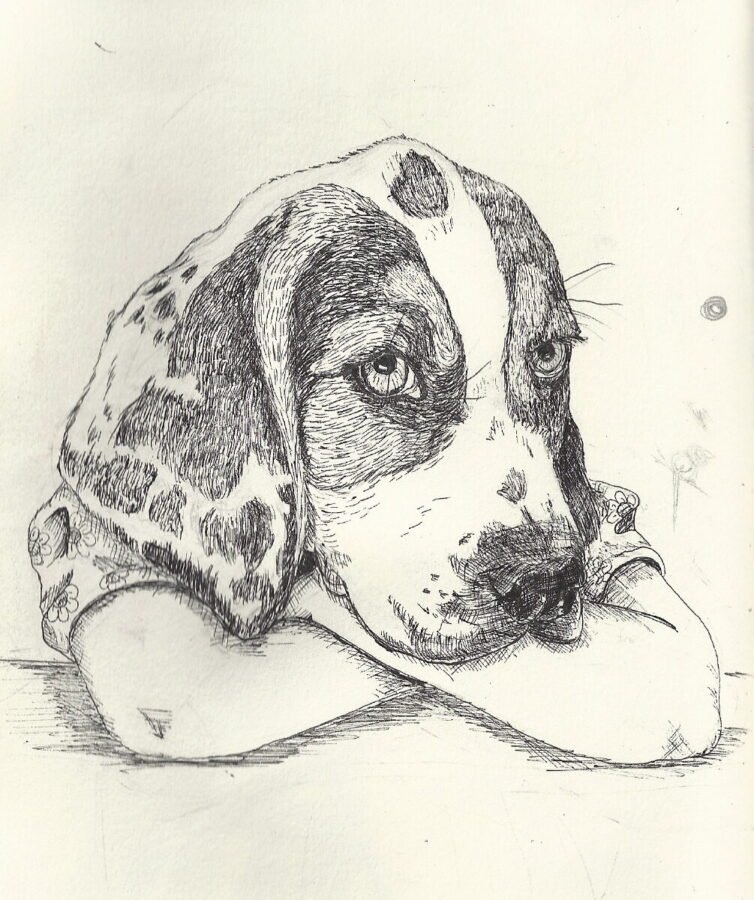
credit: robards
What Is Hatching and Cross-Hatching?
 Sketchbooks.org | RESEARCH HUB:
Hatching and Cross-Hatching Drawing
Visual research is critical for any creative endeavor. We have compiled specialized links to lead you directly to images, videos, and inspiration for "Hatching and Cross-Hatching Drawing" across the web's best visual search platforms.
Hatching Defined
Hatching is a classic shading technique that uses a series of parallel lines placed closely together to suggest shadow, depth, and form. The illusion of volume comes from the density, angle, and thickness of these lines. When lines are drawn closer together, the area appears darker; when spaced farther apart, the area appears lighter. This method allows artists to create tonal variation without relying on blending or smudging.
Cross-Hatching Explained
Cross-hatching builds upon hatching by layering additional sets of lines at different angles. Typically, artists use intersecting strokes—often diagonal or perpendicular—to intensify value and texture. By varying the direction and overlap of these strokes, cross-hatching produces richer, darker tones and complex surfaces. This technique is especially effective for depicting intricate textures such as fabric, hair, or rugged terrain.
Value Contrast and Line Spacing
Both hatching and cross-hatching rely entirely on value contrast created through line spacing rather than tonal fills. The artist controls light and shadow by adjusting how tightly or loosely the lines are drawn. This linear approach provides precision, enabling subtle gradations or bold, dramatic effects depending on the chosen spacing and angle.
Control Over Texture and Character
These techniques offer high control over the texture and character of a drawing. Fine, delicate lines can suggest softness or smoothness, while bold, heavy strokes can imply roughness or solidity. Because hatching and cross-hatching are versatile, they are used across mediums—pen and ink, graphite, and even digital illustration—to add dimension and personality to sketches.
Why Use Hatching and Cross-Hatching?
Clear Control Over Value Transitions
Hatching and cross-hatching allow artists to manage light and shadow with precision. By adjusting the spacing, angle, and density of lines, they can create smooth transitions or sharp contrasts without relying on tonal fills. This control makes the technique especially useful for studies where clarity of form is essential.
Stylized Texture and Graphic Language
Beyond shading, these techniques introduce a distinctive visual texture. The repetition of lines creates rhythm and pattern, giving drawings a graphic quality that feels both intentional and expressive. This stylization is often used in illustration, printmaking, and comics to establish a unique visual identity.
Form Modeling Without Smudging
Unlike blending or gradient shading, hatching builds form through structure rather than smudging. Each line contributes to the illusion of depth, allowing artists to model surfaces while keeping the drawing clean. This makes the technique ideal for works that require precision or durability, such as architectural sketches or ink illustrations.
Classic Hand-Drawn Aesthetic
Hatching and cross-hatching carry a timeless quality. Their linear approach recalls traditional etchings, engravings, and pen-and-ink drawings. Whether used in print or digital formats, the aesthetic feels handcrafted, connecting contemporary work to centuries of artistic tradition.
Skill Development Benefits
Practicing hatching enhances more than just shading ability. It strengthens hand-eye coordination, improves line economy (using fewer, more intentional strokes), and sharpens awareness of light direction. These skills translate across disciplines, benefiting painters, designers, architects, and figure artists alike.

Understanding Line Direction and Density
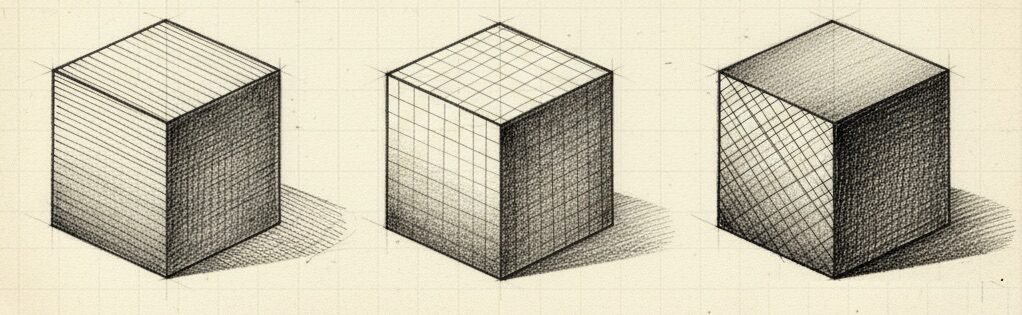
Parallel Hatching
Parallel hatching involves drawing lines that all move in the same direction, such as horizontal, vertical, or diagonal strokes. This method is ideal for creating a consistent tone across an area. By varying the spacing between lines, artists can shift from light to dark values while maintaining a uniform texture. Parallel hatching is often used for backgrounds, flat surfaces, or areas where smooth shading is desired.
Cross-Hatching
Cross-hatching builds complexity by layering sets of lines that intersect at angles, typically between 45° and 90°. Each additional layer deepens the value, producing darker tones and richer textures. This technique is particularly effective for modeling form, as the intersecting lines create a sense of depth and dimensionality. Cross-hatching is widely used in pen-and-ink drawings, etchings, and illustrations that require strong contrasts.
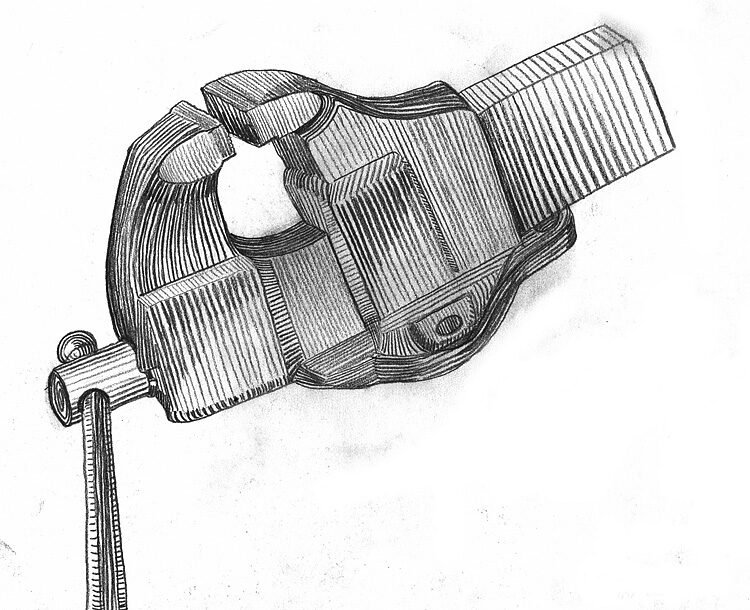
Contour Hatching
Contour hatching follows the curves of the subject, wrapping lines around its form. This approach enhances volume and realism by mimicking the way light interacts with three-dimensional surfaces. For example, contour hatching around a cylinder or sphere reinforces its roundness, making the drawing feel more lifelike. It is especially useful in figure drawing and anatomical studies, where capturing the sense of structure is essential.
Tick Hatching
Tick hatching (or stipple) uses short, quick marks that taper off, often applied in clusters. These strokes are excellent for adding texture, such as rough surfaces, hair, or foliage. They can also be used to create subtle shadow transitions, where longer lines might feel too heavy. Tick hatching adds energy and variety to a drawing, breaking up areas of uniform shading with dynamic detail.
Density and Visual Effect
The spacing of lines directly controls value: closer lines appear darker, while wider spacing yields lighter tones. Beyond light and shadow, density also influences the visual mood. Tight, dense hatching can feel intense or active, while loose, widely spaced lines create a calmer, more open atmosphere. By adjusting both direction and density, artists gain precise control over how their drawings communicate tone, texture, and emotion.

Tools and Surfaces for Line-Based Shading
The tools you use can influence the style and fluidity of your hatching:
- Graphite Pencils: Offer a broad range of soft to hard lines, good for subtle tonal work
- Ink Pens (Micron, dip, technical): Provide crisp, consistent marks ideal for detailed cross-hatching
- Brush Pens: Allow varied stroke thickness and dynamic expression
- Etching Tools: Traditional for engraving fine linear texture
- Digital Brushes: In Procreate, Clip Studio Paint, or Photoshop, use pressure-sensitive pens and custom hatching brushes
Choosing the Right Surface for Hatching
Smooth Bristol Board
Smooth bristol board is often the preferred choice when precision is the goal. Its polished surface allows pen and ink to glide effortlessly, producing crisp, uninterrupted lines. Because the paper resists feathering, artists can achieve fine details and consistent strokes, making it ideal for technical drawings, architectural sketches, or comic art. The lack of texture ensures that every mark remains sharp, emphasizing clarity and control.
Textured Paper
Textured paper introduces a subtle vibration to each stroke, enhancing the graphic quality of hatching. The tooth of the surface catches the medium, creating variations in line weight and tone that add character and depth. This natural irregularity can make shading feel more dynamic, especially in expressive sketches or figure studies. Artists often choose textured paper when they want their hatching to feel organic, lively, and less mechanical.
Matching Surface to Style
The choice between smooth and textured surfaces depends on the desired outcome. Smooth bristol board supports clean, deliberate rendering, while textured paper encourages spontaneity and visual energy. By experimenting with both, artists can discover how surface qualities influence the mood and impact of their hatching, tailoring each project to its unique expressive needs.
Building Value with Line Technique
Creating a smooth gradient or modeling form with line involves:
- Starting with a light directional hatch to set your lightest shadows
- Layering additional hatches with slight directional shifts to deepen tones
- Using tighter spacing and denser intersections to hit your darkest values
- Leaving blank space or sparse lines for highlights or light areas
- Avoiding overly uniform lines—variation adds interest and avoids stiffness
Practice consistent hand pressure and control line length to ensure unity across forms. Try rendering spheres, cubes, or still-life studies with directional light for hands-on application.
Creating Texture with Cross-Hatching
Expanding Beyond Form
Cross-hatching is not limited to modeling light and shadow—it can also replicate the tactile qualities of surfaces. By varying line rhythm, pressure, and intersection angles, artists can suggest how an object feels as well as how it looks. This dual function makes cross-hatching a powerful tool for both realism and stylization.
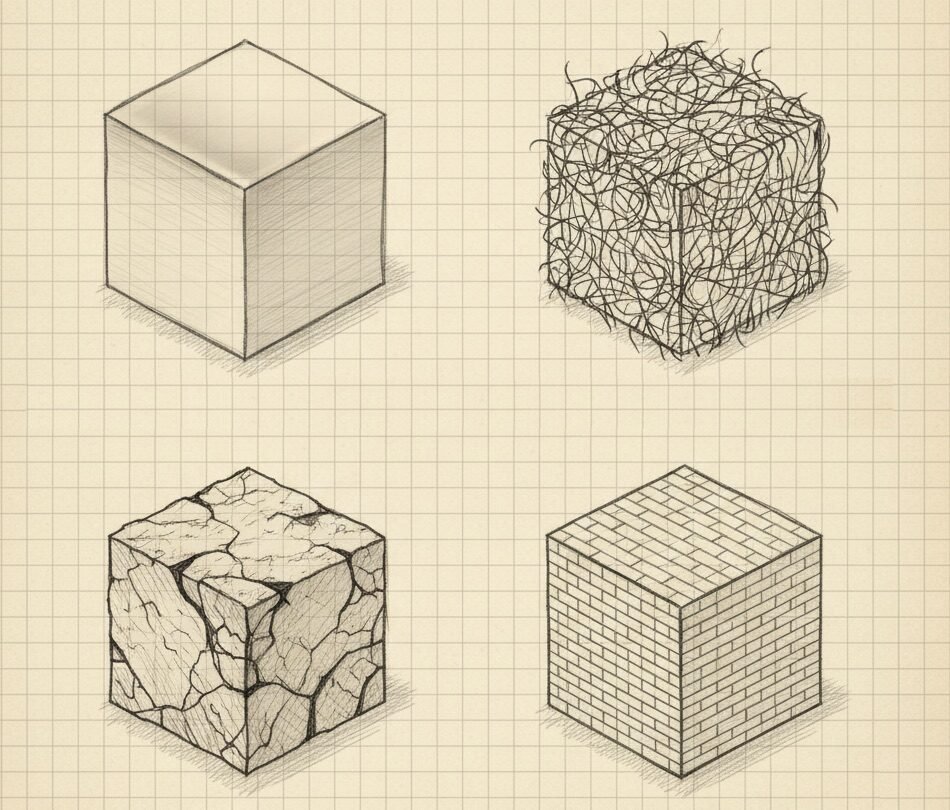
Creating Specific Textures
- Smooth Porcelain: Fine, close-set hatches produce a delicate surface with minimal variation, mimicking the polished finish of ceramics.
- Dry Grass or Tangled Hair: Loose, chaotic hatch angles convey irregularity and movement, capturing the organic messiness of natural textures.
- Cracked Stone: Sharp, angular strokes emphasize jagged edges and fractures, giving the impression of rough, broken surfaces.
- Brick or Architecture: Structured, rhythmic lines imitate the repetition and order of man-made materials, reinforcing solidity and pattern.
Line Rhythm and Pressure
The rhythm of strokes—whether steady and controlled or erratic and spontaneous—plays a major role in texture creation. Light pressure produces subtle, airy effects, while heavy pressure adds boldness and grit. Adjusting these qualities allows artists to move seamlessly between soft, smooth textures and rugged, coarse ones.
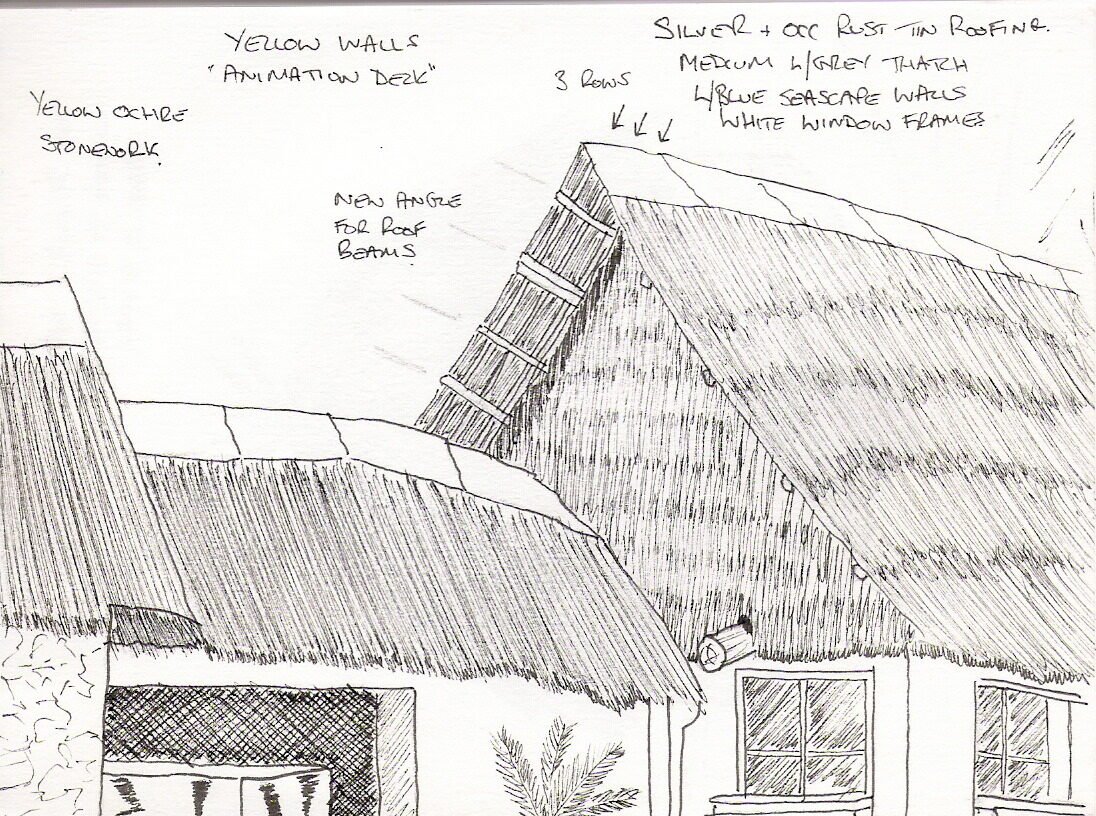
Versatility in Application
This ability to convey both light and material makes hatching and cross-hatching incredibly versatile. From natural landscapes to architectural studies, artists can use these techniques to enrich drawings with tactile realism or expressive abstraction. Whether suggesting bark on a tree, fabric folds, or the sheen of polished stone, cross-hatching transforms simple lines into complex surfaces.
Hatching in Composition and Design
Hatching isn’t just for isolated drawings—it’s an excellent tool for compositional balance and stylistic unity. Artists often use line variation to direct attention:
- Use dense hatching in shadows to push parts of the image back
- Employ lighter hatching near focal points for visual breathing room
- Create textural contrast by juxtaposing smooth areas with textured hatching
- Use line rhythm to guide the eye across the form or page
In printmaking, comics, and technical drawing, hatching is a core compositional language—and in digital art, it adds a traditional edge to modern layouts.

Sketchbooks.org | INSPIRATION & SUBJECTS
5 Interesting Sketchbook Webpages To Check Out
5 must-visit sites that inspire, educate, and showcase the art of sketching. Whether exploring digital archives, discovering innovative tools, or browsing collections of historic sketchbooks, these connect creators with valuable resources. Dive into pages that...
Frequently Asked Questions
What is the difference between hatching and cross-hatching?
Hatching uses parallel lines, while cross-hatching layers lines in intersecting directions to build depth.
Can hatching techniques be used in digital drawing?
Absolutely—digital brushes can replicate traditional hatching and allow for customization and undo.
How do I practice hatching effectively?
Start with value scales using line density, then apply it to basic geometric forms like spheres or cubes.
What pen is best for hatching and cross-hatching?
Technical ink pens, dip pens, or fine liners work best for consistent, crisp strokes.
Is hatching only for black and white drawings?
No—you can use it with colored pens, pencils, or over watercolor washes for mixed media effects.
Does line direction matter in hatching?
Yes—direction affects the form’s perceived curvature, flow, and texture.
How can I avoid making my hatching look messy?
Use consistent pressure, deliberate spacing, and overlap with intention; avoid overworking.
Final Thoughts
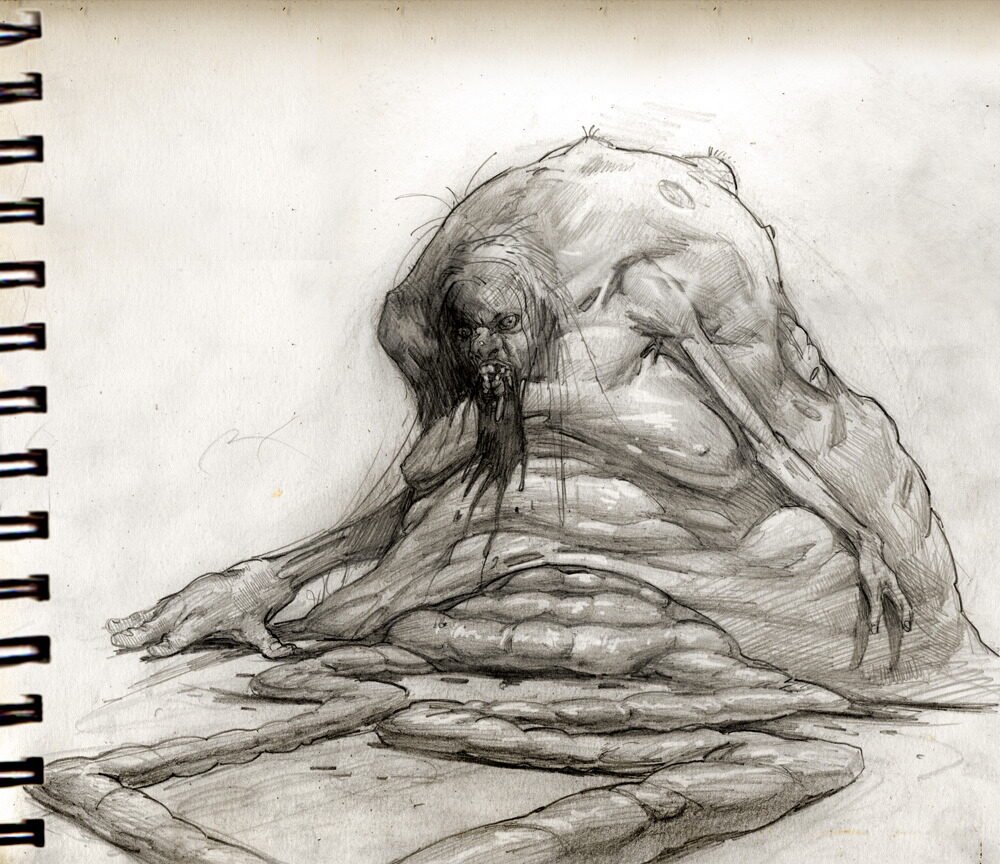
Mastering hatching and cross-hatching doesn’t just improve your shading—it enhances your understanding of value, structure, and expression. This time-tested approach empowers you to render light and form with precision and personality, all from the simplest of marks: lines.
Whether you’re sketching in a museum, refining a concept design, or inking a comic page, learning to control light through hatching builds both discipline and style. Every line is a decision—and the more you practice, the more powerful those decisions become.
credit: edrick
Ready to Share Your Work?
What type of paper texture do you prefer for sketching?

The historical lineage of this method made me feel like I was drawing beside da Vinci.
quite useful breakdown of angle layering—turned my scribbles into something more – intentional scriblle
Tried layering hatching for the 100th time and actually saw the form pop out of my page and into my car. Don’t Drive and Draw