
Table of Contents
Getting Scaled
In the world of classical representational art, sight-size drawing remains one of the most precise and time-tested techniques for achieving accurate proportions.
Rooted in traditional atelier training, this method places your drawing and subject side by side, allowing you to view them from a fixed distance and compare them as if they were reflections of each other. Whether you’re sketching a figure, casting a still life, or blocking in a portrait, sight-size teaches you to see with clarity and discipline.
credit: sisposmbah
This in-depth guide explores how sight-size works, why it remains relevant to artists today, and how to incorporate it into your studio practice with efficiency and grace.
What Is Sight-Size Drawing?
Sight-size drawing is a method in which both the subject and the drawing surface are arranged so they appear at the same scale from the artist’s viewing point. By stepping back to a consistent distance and aligning your line of sight with both, you can visually measure and compare with great accuracy. Unlike constructive drawing or comparative measurement methods, sight-size doesn’t require using arbitrary units—your eye becomes the ruler.
This classical drawing technique emphasizes proportional accuracy, gesture alignment, and a deep understanding of value relationships, especially useful in figure drawing, portraiture, and cast drawing.
Why Use the Sight-Size Method?
Artists turn to sight-size when they want to focus on precision, perception, and consistency. Key benefits include:
- Accurate proportion and placement through direct visual comparison
- Refined edge relationships and contour sensitivity
- Understanding of light logic due to consistent lighting and viewing conditions
- Clear correction process, making errors visible at a glance
- Discipline and patience building, both mental and technical
This method strips away guesswork and encourages artists to rely on direct observation rather than assumptions or shortcuts.
Setting Up for Sight-Size Drawing
The effectiveness of sight-size depends on an intentional setup. Here’s how to arrange your space:
- Subject and drawing surface side by side: Whether it’s a figure model or a cast, place them at the same vertical level
- Stand or stool for stable posture: Maintain a repeatable viewing height
- A plumb line and t-square or mahl stick: For verifying vertical and horizontal alignment
- Consistent viewing point: Mark your stance on the floor with tape to ensure accurate comparison
- Good directional lighting: Favor a single, strong light source to emphasize form
This structured setup becomes second nature over time and reduces variables that interfere with observational drawing.
Practical Techniques for Precision
Sight-size drawing encourages a calm, deliberate workflow. Start with large shapes and structural alignments before focusing on details.
- Begin with block-ins: Use light straight lines to establish the general silhouette of the form
- Use negative space actively: Measure relationships between the subject and its surrounding shapes
- Compare angle relationships: Use your pencil or a stick to visually check tilt or alignment
- Step back frequently: View from your fixed observation point to catch errors
- Squint often: This helps evaluate overall value masses and sharpens edge contrast
Using visual calibration in tandem with light measuring tools deepens your eye’s ability to detect subtle shifts in gesture, mass, and proportion.

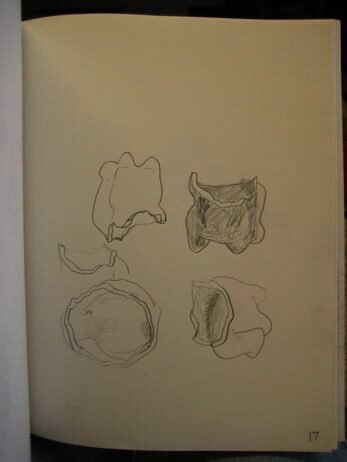
credit: robards
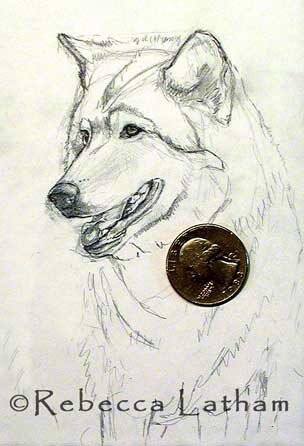
credit: rebeccalatham
Sight-Size in the Atelier Tradition
Sight-size remains a cornerstone in classical atelier settings. Students typically begin with cast drawing to develop disciplined eye training, followed by portrait and figure work. With each project:
- Visual habits deepen
- Value structure becomes intuitive
- Muscle memory enhances mark precision
- Artistic confidence increases through repetition
Whether you’re enrolled in a formal program or self-teaching, adopting atelier methodology grounds your practice in centuries of artistic lineage.
When to Choose Sight-Size Over Other Methods
While powerful, sight-size isn’t always the best fit for every situation. It excels in:
- Studio settings with controlled lighting
- Fixed-position drawing (not ideal for plein air or mobile sketching)
- Training early-stage realism
- Portrait and still life rendering where likeness and symmetry are crucial
For dynamic, imaginative, or mobile work, you may prefer gesture drawing, grid-based methods, or constructive forms. Sight-size is one arrow in the quiver—know when to use it for maximum effect.
Integrating Sight-Size With Modern Tools
Contemporary artists are blending traditional methods with modern media:
- Digital tools like tablets can mimic the sight-size principle by placing reference photos next to the working canvas
- Photo grid overlays for early proportion matching
- Software like Procreate or Photoshop allows layering and visual toggling for proportion checks
- Printouts of life-size references can be placed beside canvases for manual comparisons
While some purists may resist digital aids, the core value of sight-size—training the eye—can still be reinforced through hybrid workflows.

 Sketchbooks.org | SITE NEWS
A Developer’s Look at the Sketchbooks Plugin Suite
Explore the intersection of technology and art. Discover how the Sketchbooks Plugin Suite is being developed to create this online Artist Gallery Space.
Frequently Asked Questions
What is sight-size drawing?
It’s a classical technique where the artist and viewer observe the subject and drawing side by side at the same scale to ensure accuracy.
Is sight-size only used in portrait or figure drawing?
No—it’s equally valuable in still life, cast studies, and even sculpture preparation.
Do I need a large studio to use this method?
Not necessarily, but you do need enough space to step back from the setup for proper comparison.
How is sight-size different from comparative measurement?
Sight-size uses fixed visual comparison at equal scale, while comparative methods use unit-based internal measurements.
Can I practice sight-size without a model?
Yes—you can use photographs or classical casts to simulate the experience.
Is this method suitable for beginners?
Absolutely—it trains observational precision early and builds confidence in proportion handling.
What tools help with sight-size drawing?
A plumb line, mirror, t-square, easel, and consistent lighting all support effective setup.
Can I use sight-size in digital art?
Yes—by placing reference images side-by-side on-screen and maintaining consistent viewing alignment.
Final Thoughts
Sight-size drawing isn’t just a method—it’s a mindset rooted in patience, discipline, and direct perception. By standing back, observing carefully, and calibrating your drawing with your eye, you refine your artistic intuition and build lasting visual awareness. Whether you’re working in charcoal on toned paper or painting digitally with a reference at hand, the principles of sight-size will sharpen your craft and deepen your understanding of form.
Let the method anchor your training, and you’ll find that every other technique you explore will grow stronger, steadier, and more precise in its presence.

credit: rickberry
Ready to Share Your Work?
What is your dream sketching trip destination?

It’s kind of magical how precise and “right” everything looks using this method. Like making a photograph, but drawing it, anyway, really comes to life at scale.