Table of Contents
Shading is the soul of sketching. It transforms flat lines into dimensional forms, adds mood, and brings life to your drawings. Whether you’re sketching portraits, landscapes, or abstract compositions, mastering shading techniques is essential. One of the most accessible and surprisingly effective methods involves using your own fingers—blunt, warm, and intuitive. But fingers are just the beginning. In this guide, we’ll explore how to use blunts fingers and other tools to shade your sketches with precision, texture, and depth.
Why Shading Matters in Sketching
Shading is more than just adding darkness to a drawing. It defines light sources, creates volume, and guides the viewer’s eye. Without shading, even the most accurate line drawing can feel lifeless.
- Adds Realism: Shading mimics how light interacts with surfaces.
- Creates Depth: It separates foreground from background and gives form to flat shapes.
- Enhances Emotion: Soft shadows can evoke calm, while harsh contrasts add drama.
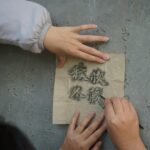
Using Your Fingers for Shading
The Natural Tool
Your fingers are always available, responsive, and capable of subtle control. Blunt fingertips allow for soft gradients and organic blending that mimic natural transitions in tone.
- Technique: Use the side of your finger to gently rub graphite or charcoal.
- Control: Vary pressure for lighter or darker tones.
- Texture: Fingers create a smooth, velvety finish ideal for skin, clouds, or fabric.
Pros and Cons
Pros:
- Immediate and intuitive
- Great for soft transitions
- No extra tools needed
Cons:
- Can smudge unintentionally
- Oils from skin may affect paper
- Less precise than dedicated tools
Other Tools to Shade Your Sketches
Blending Stumps (Tortillons)
These tightly rolled paper tools offer precision and control. They’re perfect for small areas and detailed shading.
- Use: Rub over graphite to blend edges or soften lines.
- Maintenance: Clean by gently sanding or unrolling.
Tissue and Cotton Pads
Soft and absorbent, tissues and cotton pads are ideal for large areas and smooth gradients.
- Technique: Fold and dab or sweep across the surface.
- Best For: Backgrounds, skies, or soft shadows.
Brushes
Soft bristle brushes can lift excess graphite or spread pigment evenly.
- Use: Lightly sweep across shaded areas.
- Effect: Airy, subtle transitions with minimal smudging.
Chamois Cloth
A favorite among charcoal artists, chamois cloths offer a buttery blend and can be reused many times.
- Technique: Wrap around finger or use flat.
- Ideal For: Charcoal, pastel, and soft graphite.
Erasers as Shading Tools
Erasers aren’t just for correction—they’re powerful tools for subtractive shading.
- Kneaded Erasers: Moldable and great for lifting highlights.
- Vinyl Erasers: Sharp edges for crisp light areas.
Choosing the Right Tool for the Job
Based on Medium
- Graphite: Fingers, blending stumps, tissues
- Charcoal: Chamois, brushes, kneaded erasers
- Colored Pencil: Burnishing tools, soft cloths
Based on Surface
- Smooth Paper: Fingers and tissues work well
- Textured Paper: Brushes and stumps reach into grooves
Based on Style
- Realism: Use multiple tools for layered shading
- Sketchy/Expressive: Fingers and rough cloths add character
Tips for Clean and Effective Shading
Layer Gradually
Start light and build up. This gives you control and prevents overworking the paper.
Mind the Light Source
Always shade with a clear understanding of where the light is coming from.
Protect Your Work
Use a scrap sheet under your hand to avoid smudging. Fixatives can preserve finished sketches.
Practice with Purpose
Try shading spheres, cubes, and faces to understand how light behaves.

 Sketchbooks.org | TECHNIQUES & PROCESS
Monoline Abstraction Drawing | Create Entire Artworks with a Single Unbroken Line
Discover the meditative flow of the monoline. Explore the challenge of creating complex, abstract compositions using one continuous, unbroken stroke.
Frequently Asked Questions
Can I use my fingers to shade pencil drawings?
Yes, fingers are excellent for soft shading and blending graphite.
What’s the difference between a blending stump and a tortillon?
They’re similar, but tortillons are thinner and better for small details.
How do I clean a blending stump?
Gently sand the tip or unroll the paper to expose a fresh surface.
Is it safe to use fingers for charcoal shading?
Yes, but wash hands afterward to avoid skin irritation or smudging.
What’s the best tool for shading large areas?
Tissues, cotton pads, or soft cloths work best for broad, smooth shading.
Can erasers be used to create highlights?
Absolutely—kneaded and vinyl erasers are perfect for lifting pigment and adding light.
Should I use a fixative after shading?
Yes, especially for charcoal or graphite-heavy sketches to prevent smudging.
What paper is best for shading techniques?
Medium to heavy-weight paper with slight texture holds shading well.
How do I avoid over-shading?
Work in layers, step back often, and preserve highlights intentionally.
Can I combine tools in one sketch?
Yes, mixing tools adds richness and variety to your shading.
Final Thoughts
Blunt fingers and other tools to shade your sketches offer a wide spectrum of possibilities—from soft, intuitive blends to crisp, controlled transitions. Whether you’re a beginner or seasoned artist, exploring different shading tools enhances your technique and deepens your creative expression. The key is to experiment, observe, and refine. Your sketches will not only look better—they’ll feel more alive.
Ready to Share Your Work?
What inspires you to pick up your sketchbook most often?